Sunday, August 18, 2013

How To Get Free 6GB Worth Of Data Bundle On Your Airtel Sim

This tweak is similar to one of my recent post on How To Get Free 500MB Worth Of Data Plan On Your Airtel Sim, the tweak is tested and working fine before posted but the sad news about it is that you can only use Samsung Galaxy 2 Phone to get it done, you can borrow it from your friend and follow the below procedure to get free 6GB if you don't have Samsung Galaxy 2.

How to Get Started
  • Get a Samsung Galaxy 2 Phone, insert your Airtel SIM card
  • Scroll to the message and send s2 to 141
  • After you have sent the text, wait for a message that will confirm your 6gb!
  • Dial *141*712*0# to view your mb 
It is simple as that. Enjoy!

This free data bundle has been tested and it works perfectly. If it doesn’t work for you, don’t worry, wait for my next post.

Hope this information helps?
If it works for you, don't forget to comment here and remember to Click Share/Like buttons for the benefit of others.

If you enjoyed this post and wish to be informed whenever the new posts published, then make sure you Subscribe to our regular Email Updates!

Thursday, August 15, 2013

How To Get Free 500MB Worth Of Data Plan On Your Airtel Sim

Tonight I will be sharing with you on how you can get free 500mb on your Airtel Network. No much talk, Below is the detail.

How to Get Started
  • Get a Samsung Galaxy [be it tab or not], insert your Airtel SIM card
  • Send “SMART” [without quote & it must be in capital letter, as I wrote it] to “141
  • After you have sent the text, you will be notified that you have been given 500MB which valid for 12months
  • After 1 hour or more, remove the SIM card and insert it on your modem to start surfing the net with your free data bundle.
  • Dial *141*712*0# to view your mb
Note: It's 500mb and can only be activated on Samsumg Galaxy but can be browse using any Phone...
That's all. Enjoy!

This free data bundle has been tested and it works perfectly. If it doesn’t work for you, don’t worry, wait for my next post.

Hope this information helps?
If it works for you, don't forget to comment here and remember to Click Share/Like buttons for the benefit of others.

If you enjoyed this post and wish to be informed whenever the new posts published, then make sure you Subscribe to our regular Email Updates!

Update: Mtn free 3GB Is Not Finally Block, Browsing Fast & better than before

Few weeks ago I wrote a post on how to Get 3GB On Your MTN Sim For Free and am happy that a lot of people got it and enjoyed it before China Hacker blocked it, recently I made another post on how to Get Free 7.5 Gigabytes which was blocked too but I made this post to let you aware that the first tweak of  Free 3GB is not finally blocked. I just checked my Sim today and I discover that one of the Sim in which the free 3GB was activated is working back again; faster and better than before, just that it is not open Google Play on my Android. Could this be magic SIM?

If you succeeded in sending 100H to 131 and you are given Mtn Free 3GB but you thought it was blocked or you are unable to use it, just make sure you configure your APN like this;
Apn: web.gprs.mtnnigeria.net
Username: web
Password: web
And to those whose SIM 7.5GB was transferred to and you are sure you did not finish it before it was wiped, just try and browse with your SIM. Make sure you don’t send 2 to 131 at all if not it will be blocked.

I also learnt that Mtn is now working on some Android phone to limit the access to some restricted site.. I will update you the way out very soon.

It seems  the Mtn magic sim stuff is back too with 24hrs old method. You can give it a try with your old Sim of 128k, check the link below for more detail on how to activate it.
Hope this information helps?
If it works for you, don't forget to comment here and remember to Click Share/Like buttons for the benefit of others.

If you enjoyed this post and wish to be informed whenever a new post is published, then make sure you Subscribe to our regular Email Updates!

How To Update HTC G2 To Android 4.2.2 Jelly Bean CM10.1 AOSP ROM

This tutorial we  guide you through how to update your HTC G2 to Android 4.2.2 Jelly Bean CM10.1 Custom ROM. Thanks to a developer on XDA who has ported the AOSP version of Android 4.2.2 Jelly Bean on this Android phone. But before the tutorial I should let you know some warnings and pre-requisites.

Disclaimer – All the tools, mods, firmwares or ROMs etc. Mentioned below belong to their respective developers or owners. In any case while following the tutorial you do something wrong, miss a step or whatsoever, Shelaf are not  liable or responsible for any damage or brick of your device in any case. We are not forcing you to attempt this tutorial, its all your wish.

Pre-requisites
  1. You need to installed latest HTC G2 USB Drivers on your PC.
  2. You need to enable USB Debugging Mode which is deactivated by default.
  3. You Smartphone should have 70-80% charged remaining.
  4. Your HTC G2 should be rooted.
  5. Backup your important data like Call logs, SMS and other data in stored in phone memory so in case if anything goes wrong, your data are not hurt.
How to Update HTC G2 to Android 4.2.2 CM10.1 AOSP ROM
  1. Download Android 4.2.2 Jelly Bean CM10.1 AOSP ROM for HTC G2 and Google Apps on your computer.
  2. Connect your HTC G2 to your PC and copy the downloaded files (aosp4.2.2.zip and gapps4.2.zip) to SD card.
  3. Turn OFF your phone and disconnect the device by unplugging the USB cable.
  4. Now you will need to get your phone in ClockworkMod. For that turn ON the phone while pressing Volume Down + Home buttons.
  5. In CWM recovery, you will need to perform full data wipe first, select again wipe cache and then scroll down to Install zip from sdcard. Select power button to select it.
  6. Again press the power button and select choose Install zip from sdcard.
  7. Using volume keys navigate to ‘aosp 4.2.2 ROM’ zip file and select it by pressing the power button.
  8. Installation will begin on the next screen, confirm it.
  9. Repeat the same for Google Apps package.
  10. When the installation is completed, go to +++++Go Back and then reboot your phone from recovery Menu.
That is it. Now you have successfully updated your HTC G2 to CM10.1 Android 4.2.2 Custom ROM!

Find this post helpful drop your comment and remember to click Share/Like buttons for the benefits of others.
If you enjoyed this post and wish to be informed whenever the new posts published, then make sure you Subscribe to our regular Email Updates!

Download Latest HTC Sync Manager For Your HTC Android Device

HTC Sync™ Manager is a necessary software when you use a USB data cable as the link between the PC and your HTC devices. It enables your computer to recognize your HTC mobile or Tablet.
HTC Sync Manager is a free tool to synchronize your media files between your HTC phone (for example Android) and your desktop computer. Other than media files (photos, music and videos) you can also transfer your contacts and calendar entries between your Smartphone and PC. HTC Sync includes a photo management tool to organize and edit, for example crop and rotate, your pictures. The music player allows importing playlists from iTunes and Windows Media Player, as well as creating your own playlists that can be synced with your phone. Once setup, browser bookmarks, contacts and calendar synchronize automatically every time your phone and computer are connected. Finally, the data on your PC synced with HTC Sync serves as a backup should you lose your phone.

Latest HTC Sync™ 3.3.21 Driver


Installation Instructions
  1. Run “ htc_sync_setup_3.3.21.exe” to install it to your PC, and follow the Install Shield Wizard to finish the installation. (Suggestion: Please close all running programs and temporarily exit your anti-virus program when you install the HTC Sync)
  2. Select the “Complete” Setup Type for faster and easier installation process, and then press “Install” to begin the installation. (For advanced users you could choose “Custom” to change the pre-defined shortcuts and the installed application folder path by your own.)
  3. After you saw the Install Shield Wizard Completed, please press “Finish” to exit the Wizard.
Start To Use HTC Sync
  1. Use the USB cable to connect your phone to the PC
  2. When your phone prompts you to choose a type of USB connection, tap HTC Sync, and then tap Done.
  3. Wait for HTC Sync to recognize your phone. On the Device setup screen, enter a name for your phone.
  4. Click Save. The Device panel then opens. On the Device panel, you can set your sync options, see your phone's general information, check the used and available space on your storage card, and begin synchronization
Find this post helpful drop your comment and remember to click Share/Like buttons for the benefits of others.
If you enjoyed this post and wish to be informed whenever a new post is published, then make sure you Subscribe to our regular Email Updates!

Sunday, August 11, 2013

Get Your Mtn Free 7.5 Gigabytes Now (Not Required Droping email any more)

I have no choice than to post this tweak here, i have closed the comment box in my previous post about Mtn 7.5GB, this decision was made in order to control spam on my blog and to listen to people comment on this tweak.
No much talk this morning, we all aware it, strait to the point.

Here is how it works
First of all you need to Register for the Data Gifting service:
  • Dial *131*2*1# or text REG to 131; you will receive a unique security PIN
  • You are required to change the system generated PIN to a new PIN they can easily remember by dialing*131*2*5# or by texting Change OLD_PIN NEW_PIN NEW_PIN to 131. E.g Change 0000 1234 to 131. Where 0000 is old PIN and 1234 is your new PIN.
Now How To Get Free 7 Gigabytes
Note that you need another Mtn number to transfer this 7GB to your number, after you have follow the above procedure on the number you wish to use for transfer this gigabytes to your number. 
Text key word "GIFT [Destination Number][Data Bundle Code][PIN] to 131. E.g Gift 0803xxxxxxxx 101 1234.
Where 101 is the code of 5GB + 2GB Bonus monthly plan and 1234 is your PIN"
Note: When try this code and you receive a message: Sorry, you do not have sufficient credit to perform this operation. Please recharge and try again.Thanks you! 
This simply means that the number you are transferring the Gigabytes to is not support and you need to get another number to do it.

For those people complain that 7.5Gb code is not working for them, try any of the below codes.
What you need to do is to replace 101 of 7.5Gb Code with any of below code.
  • 111 - 1.5Gb for 30days
  • 102 - 4.5 for 30days, Night(9PM-6AM)
  • 107 - 4.5 for 30days, Day(9AM-9PM)
  • 108 -  4.5 for 30days, Weekend (Fri9PM-Mon 6AM)
 E.g To transfer 1.5Gb Text key word "GIFT [Destination Number][Data Bundle Code][PIN] to 131. E.g Gift 0803xxxxxxxx 111 1234.
Where 111 is the code of 1.5GB monthly plan and 1234 is your PIN"

Use it why it last. The code is still working well up till the moment i made this post
 Note: The post may me remove on this blog any time.

Don't thank me....
Just make sure you share or like and tell your friends and families to always visit this site...

Never miss any of my future post CLICK HERE TO SUBSCRIBE Once entered, you will have to check your Inbox for a confirmation email containing a confirmation link. Once you VERIFY your email by clicking on the confirmation link in the message, you will never miss any future articles

Saturday, August 10, 2013

How To Get Unlimited Gigabytes On Mtn For Free + How To Transfer Up To 7GB To Another Mtn User

Few days ago i made a post on How To Get 3GB On Mtn Sim For Free which rock well before it get blocked but am happy to tell that we have dig out another one which is more superb than the previous one. With this new way of getting free Gigabytes, you can send up to 7GB to another Mtn Users, also with one Mtn Sim card you can transfer this Gigabytes to many Mtn line and the code is working fine with #0.00! balance.

It is time to enjoy what i have been enjoying for the past 7 days, i was not intended to drop this tweak this time around because it is what is really fetching lot of money into pocket of hackers now and nobody wish to reveal the secret for  free but i don't blame them because most of them spent a lot of money to get the tweak. Due to one of my recent post about  How To Get 3GB On Mtn Sim For Free which many people complain that is no more working while am still flexing with it, any way, i decide to drop this one to replace it for you guys. 

What Can I Do With The Mtn Free 7 Gigabytes?
  1. Browse and Download unlimited.
  2. It only last for one Month
  3. You can browse with it on PC/Tablet, Android, Apple phones, Symbian and Java Phones  with simple configuration.
How Can I Learn How To Get The Gigabytes?

There are series code for generating this Gigabytes but i decide to share you the best one among which  is How You Can Transfer Up To 7GB To Another Mtn User at once for free. 
Am sorry please, i don't intent to stress you but for security purpose, the code can't be drop here.

For the full detail on how to get it done; drop your email address through the comment form below and the detail will be forward to you as soon as possible.

Understand that the comment box will be closed as soon as we detect  that the code is no more working, when you came late and you met comment box closed please don't drop your email in another thread as you did last term when i posted the Glo Chocolate Tweak. This is because i hate send you the outdated information.

You Might Also Like:
Don't thank me....
Just make sure you share or like and tell your friends and families to always visit this site...

Never miss any of my future post CLICK HERE TO SUBSCRIBE Once entered, you will have to check your Inbox for a confirmation email containing a confirmation link. Once you VERIFY your email by clicking on the confirmation link in the message, you will never miss any future articles

Friday, August 9, 2013

How To Run Java Apps And Games On Your Android Device With Java Emulator

Android OS has taken a full control over other OS Whether it is Java or Windows but still we miss some of the Cool Java Apps and Games that we used to Play in our Old Nokia Symbian or Samsung Bada Handsets. Today I am going to share How to Play Java games on Android Phones using Java Emulator For Android Devices.
Emulators are the most versatile and popular tools that allows us to play apps of kind of system to another different system.We have already discussed about Bluestacks Android Emulator that allow users to run almost all Android Apps or Games on Laptop/Desktop without any problem. Java Emulator for Android works by allowing us to Play Java Apps on our Android Mobile Phone.
Generally there is no direct support provided in Android OS to Run Java Apps or games but still we can play them using Java Emulators.
How to Instal Java Games provides a totally different addictive game play that cannot be achieved in even some of the best Android Games so if you are missing your favorite java apps on your new Android Smartphone then just read this post to learn How to Install Java Apps on Your Android Device.
There is app known as JBED java emulator for Android developed by one of the developers from XDA-developers that lets you run almost all java apps on Android OS.

About JBED Java Emulator for Android :
JBED Java Emulator is an Android .apk Application developed by one of the developers from XDA-developers designed to run .jar, .jad apps or games on Android Devices. Get Access to more than 30,000 Different Java Apps by Installing JBED on your Smartphone or Tablet.JBED Java Emulator is tested on HTC Wildfire and it worked fine and Hopefully it works for Your Android Devices too.

Disclaimer :

We are not responsible for Any damage or harm that comes to Your Android Device after using the below given instructions. It is intended to be shared for Information Purpose Only. TRY AT YOUR OWN RISK.

Method 1 : Normal Installation
  • Download the JBED.apk File – Download Link 
  • Install it normally similar to other app installation. 
  • Run the App and Click “SD card” from Menu. 
  • From SD Card Select the .jar or .jad app that you wish to Install. 
  • That’s all and Now You can Run the Installed Java App from apps list.
Note: If the Above Method doesn’t works and asks for force closes then don’t worry just try the below Installation method by Installing JBED by booting into Recovery Mode.

Method 2 : CWM Recovery Mode
  • Download the JBED.zip File – Download Link 
  • Move the Downloaded JBED.zip file into SD Card. 
  • Boot Your Device into CWM Recovery. 
  • There Select Install Zip from SD Card. 
  • Here choose JBED.zip and Install it. 
  • Reboot Your Device and You are all done. 
  • Run the App and Click “SD card” from Menu. 
  • From SD Card Select the .jar or .jad app that you wish to Install.
Method 3 : Manual Installation 
  • Download the JBED Manual Installation File – Download Link 
  • Extract the JBED.zip Contents and Copy them to Your SD Card. 
  • Now Install com.esmertec.android.jbed.apk File from SD Card.
  • Next You need to move the file libjbedvm.so to the path /system/lib/
Note: You can Use Root Enabled File-Explorer i.e Root Explorer or ES File Manager to Move the File 
  • Restart Your Android Device and You are done. 
  • Run the App and Click “SD card” from Menu. 
  • From SD Card Select the .jar or .jad app that you wish to Install.
Conclusion: As said above this Java Emulator For Android is tested on HTC Wildfire or you can say Android OS 1.5 to 2.3.5 and it worked fine. We can’t guarantee that it will work for you because each device and its specifications is different but still you can try the above steps and if you face any problem please let me know. 

Hope this information helps?
If it works for you, don't forget to Comment Here and remember to hit Share/Like buttons for the benefit of others.

If you enjoyed this post and wish to be informed whenever a new post is published, then make sure you Subscribe to our regular Email Updates!

Wednesday, August 7, 2013

Tips to Develop an iPhone App and Publishing in iTunes

Many promising mobile developers tend to gravitate towards the iPhone as their preferred platform for developing applications. The Apple iPhone is a premium quality smartphone that gives great user experience and provides a great platform for designing and developing mobile applications. There are hundreds and thousands ofiPhone users around the world who reach out to greatiPhone apps on a daily basis, to the proprietary single window distribution platform – the iTunes Store.

Among the apps that are submitted for release on the iTunes store, only a handful of apps meet the app store's stringent norms and are approved by Apple. There are a number of elaborate steps between the planning stages of an iPhone application and its final deployment to the iTunes Store. Let's take a look at these steps and discuss a few tips which could make the entire discussion relatively easy.
  1. Assimilate material and plan ahead – iPhone app developers are talented, creative individuals. However no amount of skills can be effective without proper planning. Developers need to plan for the entire app development life cycle, up to the very last stage of development, even before writing a single code.
Planning each and every step of the way, considering budgetary implications, the possible problems that might be faced and their solutions while forming a strategy to promote and market the app once it is developed and launched are very important and can prove to be the decisive factor in the success of aniPhone app published and distributed in Apple’s iTunes store.

With proper planning, contingencies can be taken care of in lesser time and in most cases prevented altogether. Similarly, people withiPhone development skills should assimilate all the data, text and multimedia items required in the app development process at the very beginning. This saves developers the time to find out and gather resources at crucial final stages of the app development process when the focus needs to be entirely on the development/testing process.
  1. Good development practices and testing – Developers should be expertise on different tools that aid to development, including the most recent trends and innovations that define the iPhone app development industry. The implementation of good development practices while creating iPhone apps is beneficial in the long run as these applications are usually of higher quality.
Apple is insistent on maintaining high performance for all its applications on the iTunes Store, and the habit of inculcating recent good industry standard practices of coding and design can score quite a point. Similarly, applications need to be tested rigorously for defects, bugs, errors, flaws in design, next to overall usability and comfort of use. These are vital factors which drive overall success of the app; once released, and app developers should spend time in extensive testing, so as to eliminate the risk of the apps being rejected on the iTunes Store.

      Author Bio:
Sienna Amelia is a Tech blogger has passion to write about technology happening around the world, she started to research about the iPhone development and their strategies recent days. She can share her knowledge and thoughts with everyone. Follow via Author: Sienna Amelia on Google+.

Monday, August 5, 2013

Internet Download Manger (IDM) 7.1 with Crack Full Version 2013 For Free

Hi lovely viewers, i guess we all still enjoying and surfing with free Mtn 3GB, here is the Latest Internet Downloading Manager with cracked full version to power up your downloading speed before the China Hackers wake up to finally help the Mtn  block the loophole.

Internet Download Manger (IDM) 7.1 is the latest version of IDM Family. it is actually a device to improve down load rates of speed by as much as Five times, continue as well as plan downloading.
Internet Download Manager is a tool to increase download speeds by up to 5 times, resume and schedule downloads. Comprehensive error recovery and resume capability will restart broken or interrupted downloads due to lost connections, network problems, computer shutdowns, or unexpected power outages.

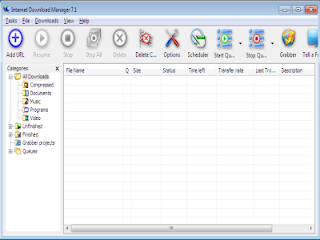
Internet Download Manager 7.1 Simple graphic user interface makes IDM user friendly and easy to use. Internet Download Manager has a smart download logic accelerator that features intelligent dynamic file segmentation and safe multipart downloading technology to accelerate your downloads. Unlike other download managers and accelerators Internet Download Manager segments downloaded files dynamically during download process and reuses available connections without additional connect and login stages to achieve best acceleration performance.

Features of Internet Download Manager 7.1 
Internet Download Manager 7.1 client friendly and easy to use. Internet Download Manager 7.1 has a stylish download logic accelerator that abilities quick dynamic file segmentation and secure multipart downloading technology to speed up your downloads. Unlike other downloading software’s and accelerators, IDM 7.1 segments downloaded files dynamically during download procedure and reuse available connections without extra connect and login stages to get best acceleration performance.


Internet Download Manager 7.1 also supports proxy servers, http protocols and ftp, redirects, firewalls, authorization, cookies, Audio MP3 and MPEG video content processing. IDM 7.1 integrates effortlessly into Microsoft IE 10 including all version, MSN Explorer, Netscape, AOL Firefox, Opera, Mozilla Firebird, MyIE2, Avant Browser and all other well-liked browsers to automatically handle your downloads. You can also pull and drop files, or use IDM from command line. IDM 7.1 can dial your modem at the scheduled time, download the files you want, then hang-up or even shutdown your PC when it's finished.

Other abilities include multilingual support, zip preview, scheduler pro, download categories, HTTPS support, sounds on different events, Speed limiter, queue central processing unit, improved virus protection on down-load completion, html assist and tutorial, progressive downloading with quota (helpful for connections that use some kind of fair access policy or FAP similar to Dire way, Direct-PC, Hughes e.t.c.) built in download accelerator and many others.

IDM Version 7.1 adds Windows 7 and Widows 8 compatibility, adds Internet Download Manager download panel for web players that can be used to download flash videos from sites like MySpace TV, YouTube and Google Videos. It’s also features complete Vista support and Windows 7, redeveloped scheduler, YouTube grabber, and MMS protocol support. The fresh version also adds improved integration for IE 10 and IE based browser, newly designed and improved download-engine, the exclusive advanced integration into all most modern browsers, improved toolbar, and a wealth of other improvements and new features.

Installation Method
  1. Download and Extract the ZIP file
  2. If you have already installed any version of IDM so first you need to uninstall and install idman7.1. 
  3. You need to install idman7.1 on fresh window.
  4. Never update idman7.1.
  5. Restart your computer after installing idman7.1
  6. idman7.1 will work for life and forever for you. 
Internet Download Manager 7.1
 
Find this post helpful drop your comment and remember to click Share/Like buttons for the benefits of others.
If you enjoyed this post and wish to be informed whenever a new post is published, then make sure you Subscribe to our regular Email Updates!

Sunday, August 4, 2013

Mtn Free 3GB Is Still Working Sharp, Re-Activate Yours Now

Good morning my dear lovely viewers, yesterday lot of comment were made on one of my post "How To Get Free 3GB", people were complained that Mtn has finally blocked the tweak due to the message they received that "Your 100 hrs 30-Day Data Plan has expired" and thing truly stopped working but around 10pm yesterday one of my blog reader tega goddowell said: "it's stil wrking i jst ativate one of my sim nw thankz" and  i made the verification then i discovered that Mtn only succeeded in blocking the active plans of 3GB but the loophole is still intact and i quickly dialed the code on one of Mtn Sim like 5 times before i slept, i was surprised around 11:57pm yesterday, when i received a message like this: Welcome to 100 hrs 30-Day Data plan. Remember fair usage policy applies at 3.0GB.

This morning i have activated more than 5 Sim with quick response.
This is to let you know that the code is still working fine and response is not delay at all. If you received a message that your 100 hrs 30-Day Data Plan has  expired, just redial the code and you will receive another 3GB without much stress. We all know the code but for the new comer, here is the code below:
  • Just send 100H to 131 and you are good to go.
  • Wait till you receive a response that your 100 hrs 30-Data plan is activated.
  • If it doesn't work the first time you tried it, please calm down and send it like 5 times again. 
  • To check your MB data balance; send 2 in an SMS to 131 
You Might Also Like:
Don't thank me....
Just make sure you share or like and tell your friends and families to always visit this site...

Never miss any of my future post CLICK HERE TO SUBSCRIBE Once entered, you will have to check your Inbox for a confirmation email containing a confirmation link. Once you VERIFY your email by clicking on the confirmation link in the message, you will never miss any future articles

Thursday, August 1, 2013

Simple Method to Root Tecno Phantom A1 (or F7)

Tecno Phantom A1 also known as Tecno F7  is indeed an awesome Smartphone and currently one of the cheapest smartphone in the Nigerian mobile market compared to other smartphones of same specification. So many people are currently buying this phone and today I want to share with you how to root Tecno F7 so as to gain root user access to your device. You can customize your Smartphone as you like once you can gain a root access on it using the method I am going to share with you now.

Steps to Root Tecno Phantom A1 or F7

  1. Download and install the compactible version of PDA.net for your PC OS here.
  2. Download ERoot from here or here
  3. Connect your phone to your PC
  4. Enable USB debugging on your Android phone in Settings > Applications > Development.
  5. Install the PDA.net you downloaded earlier on your PC.
  6. During the installation you'll be prompted to select your cell phone manufacturer and also connect your device via USB.
  7. Click on Ok and allow to install
  8. Extract and run the ERoot downloaded. Ignore the Chinese Language displayed.
  9. A root button would appear. If it doesn't, close the pda.net running from your system tray.
  10. Click on the root button and your phone would be rooted in 10 seconds.
  11. Disconnect your phone from your pc or laptop.
  12. Goto your menu and you will find superuser installed.
  13. Reboot your Tecno Phantom A1 or F7.
  14. Congratulations your phone is now rooted.

Disclaimer: I will not be held liable if the above procedure affects your phone in any way but i will like you to be assured that the above procedures works and you should give it a try. If this tutorial is any way helpful to you please leave a comment to motivate others And remember to share it.
Thanks. 

If you enjoyed this post and wish to be informed whenever a new post is published, then make sure you Subscribe to our regular Email Updates!

Wednesday, July 31, 2013

MTN Data Share: Now You Can Share Your Data Plan With Your Friends And Loved One

Now Mtn is getting things right with their new Mtn Data Share Package just like the Glo Data Gift Package.
You can now Subscribe to a Data Plan and Share with your Friends anywhere in Nigeria.

One Data Plan, Multiple Users
Now you can share your data plan with friends & loved ones, wherever they may be on the MTN network.

To get started, simply:
  • Activate an applicable data plan from the table below.
  • Dial *131*2*1# or text REG to 131; to register for MTN Data Share, you will receive a unique security PIN
  • You are required to change the system generated PIN to a new PIN they can easily remember by dialling*131*2*5# or by texting Change OLD_PIN NEW_PIN NEW_PIN to 131. E.g Change 0000 1234 to 131. Where 0000 is old PIN and 1234 is your new PIN.
  • After changing the PIN, you are required to add beneficiaries to your MTN shared Data Bundle account via USSD menu *131*2*3# or by texting Add  to 131. You can add up to 5 beneficiaries.
  • Once you have added beneficiaries, you (the sponsor) will be able to share your available data bundle among the added beneficiaries by sending the keyword Share  to 131 or simply dial USSD code *131*2*4#.
No Need for Multiple Subscription again as Far as your Friends are on MTN Network.
Enjoy.
Source: Mtn Data Share 

Remember to Share/Like this post with your friends.
If you enjoyed this post and wish to be informed whenever a new post is published, then make sure you Subscribe to our regular Email Updates

How To Get 3GB On Your MTN Sim For Free (Alternative To Magic Sim Activation)

I know most of us really enjoyed Mtn Magic Sim, now is very difficult to activate new one since China hacker help Nigeria Mtn tracked them down but am happy to bring another smile to your face guys. Here is another alternative to magic sim. This tweak will gives you 3GB data plan valid for good 30days and the nice part of it is that you can get it with #0.00!
The tweak requires a registered Mtn Sim. 0803, 0806, 0703, 0706, 0813, 0816, 0810 regardless of the type of Mtn Sim you use, you'll get your 3GB of data plan. Just make sure you do it sharp before it is detect by China hackers.

How To Do It
  • Just send 100H to 131 and you are good to go.
  • Wait till you receive a response like the one in the screenshot below:
  • If it doesn't work the first time you tried it, please calm down and send it like 5 times again.
    To check your MB data balance; send 2 in an SMS to 131
This tweak is tested working even with #0.00 as at the time of posting. Please use this tweak while it lasts meanwhile, note that the service is not intended and initiated by the service provider. Kind have in mind that they will block and stop it whenever they know of it.

Don't thank me....
Just make sure you share or like and tell your friends and families to always visit this site...

Never miss any of my future post CLICK HERE TO SUBSCRIBE Once entered, you will have to check your Inbox for a confirmation email containing a confirmation link. Once you VERIFY your email by clicking on the confirmation link in the message, you will never miss any future articles

Browse Unlimited Wtih Blackberry Plan On Your Android/Tablet Using GAE Proxy (Alternative To Droid VPN)

For those people that are still complaining about DroidVPN, here is another means to browse with Mtn Blackberry Subscriptions on your Android Mobile Phone with GAE Proxy Software & tablet users also include.

GAE Proxy is similar to DroidVPN, but a little bit different from DroidVPN. As it allows you to have access to free 10GB! unlimited browsing daily while DroidVPN allow you just 100MB daily. Please remember that this is not your ISP (Internet Service provider) so, you must have an active Blackberry Planbefore it will work for you. It works in all countries whose network is not buffeted and infected.
 
How To Use GAE Proxy To Browse With Blackberry Plan
  1. Visit Google play and search for GAE Proxy or download it here
  2. Run and install it on your Android/Tablet device
  3. Check Connect at boot
  4.   Enable Proxy Switch
  5. Make sure your Bis plan is active and well configured with the correct apn blackberry.net (If you are in Mozambique using Vodacom Network, your apn should be “internet”. Username and Password should be left empty).
  6. Connect and surf! till you are tired
If you enjoyed this post and wish to be informed whenever a new post is published, then make sure you Subscribe to our regular Email Updates

Tuesday, July 30, 2013

iPhone 4 Impresses Customers with Sleek Model and Low Cost

Apple has always been known for attracting customers with impressive and latest technology, and stylish and trendy devices. The latest device to have hit the market the iPhone5 has been creating a mass hysteria among Apple loyalists and smartphone users alike.

Fringe benefit for iPhone 4 through the iPhone5 launch
A big fringe benefit of the newest launch is that the older versions – iPhone4 and iPhone4s will now retail at a much lower price tag than its current rates. The device which is propelling its growth in price sensitive markets such India and other Asian geographies is not a latest one - the iPhone5, but one that came out 3 years ago. The iPhone4, which was originally released by Apple in 2010 is pushing Apple’s growth in such markets.

It has been reported that Apple has been making a major part of its profits through its older device versions. Apple’s earning results were released on 23rd July revealed quite a few surprises for market experts. The iPhone’s sales in Q3 registered an increase of 20% as compared to the same period last year, and an increase of 18% from what market experts were projecting.


iPhone’s increase in sales in price sensitive markets like India is evident from the fact that “India was up by 400%”, as compared to the US and Japan markets which grew by 51% and 66% respectively. This is driven by the company’s new pricing strategy which includes allowing customers to exchange any of their old smartphones to avail a cash discount of at least INR 7000. Apple is also planning on devising new strategies for iPhone4 in China where the company’s sales recently slowed down.

New sales strategy by Apple?
The iPhone4 gained high sales due to a new and aggressive price strategy by Apple. The company is targeting its older models, primarily the iPhone4 and iPhone4s in price sensitive markets, and in segments where the number of users who have never purchased a smart phone before is high. iPhone4 stands as the least expensive iPhone till date and is even available for free in the US with a two year carrier contract.

With a sleek design, the iPhone4 gives an appealing look and anyone would love to sport it, just like they would love any other Apple device. But market experts say that besides the design and technicality of the iPhone, it is the pricing strategy and the discounts offered by Apple on its older models that is driving the growth in the sales of the company. The price cuts in the older models of Apple including the iPhone4 are largely driven by decreasing production costs, falling component costs and a higher production operational efficiencies.


Alternate sales strategy
Apple also seems to be planning for a low cost model from the very start. This is evident from the increasing sales of older models which are sold at lower prices. If the company focuses on low cost models with margins in view from the very beginning, it could present a trademark Apple device at a much lower cost for people who are looking for their first smartphone at a lower price. Such a move by Apple could also enable it to compete in a better manner with Android powered devices which are provided at a comparatively much lower cost by different companies and fast eating into smartphone subscriber base.
There are no confirmed reports of a low cost Apple device as yet, but evidence strongly suggests that we could witness such a device by the end of this year. If the iPhone4 and other older phones continue their rise in the coming months, a low cost Apple engineered device will not be far away.

The downside of this new strategy?
A possible downside of the pricing strategy for older versions could mean increased problems for mobile app development companies who are already dealing with fragmentation problems after the introduction of the iPhone5. Each mobile app development company, in such a case, would have to develop apps that would suit not only the latest iPhone, but also work well on the older models as well, now that Apple is continuing to push shipments of older versions too.


Author Bio
I'm Maria Lynette, author of this article. I'm a passionate blogger interested in writing articles related to mobile aspects especially on mobile apps development companies.Follow me on Google+, Twitter,

Monday, July 29, 2013

How To Enjoying Unlimited Browsing With Glo Line Using Chocolate

View of us will still remember the last term i posted Glo G-Bam tweak because we really enjoyed it, i confirmed then that Glo network is the best for browsing. Today am happy to tell you that we have discovered another means to browse free with Glo Network on your System.
This tutorial will tamper with your imagination because you are about to learn how to browse with #0.0 on your Glo line and how will you feel if you are able to browse with this Glo line free for life?
without much stories, let’s go straight to the point.

How Can I Browse Unlimited With My Glo Line?
  • Two software will be forward to you by me
  • Download it and unzip it to your desktop
  • All the settings will be attach to the software. 
  • Just follow the instruction accordingly and you are good to surf free with Glo line.
Requirements
You must have latest version of Java Runtime installed on your PC for this tweak to work.

Can It Work On Mobile Phone?
Currently, it doesn’t work on mobile phones except PC. Efforts are being put in place to make it work on phone too.

How Can I Get This Unlimited Browsing Tweak?
Glo network are very grace and we want this tweak to last longer.
Drop your email and I will inbox you the detail.

All thanks goes to Achmat Toffa. He is the brain behind it.

Saturday, July 27, 2013

How To Surf On The Net With Mtn BIS Plan On iPhone/iPad Using TunnelBear

Most of us have already familiar with DroidVpn, SandwishVPN and PD-Proxy, as what we are using to surf the net with Mtn Bis now on the Android Mobile Phones and PC. And almost every Android & PC users are now enjoying it. But most of the Apple phone users are seriously complaining that they are unable to browse with Mtn Bis, this made me busy with a lot of research and finally came across one powerful software (TunnelBear) for the Apple phone users to enjoy Mtn Bis on their phone just like an Android and PC users.

To balance this tutorial for iPhone users, I will urge you to fastened up your seat belt and stay glued to the next information that will follow because I’m about to embark you in an unknown journey; trust me, you will be safe.
Let me quickly introduce you to TunnelBear VPN is the world’s easiest to use consumer VPN software that securely “tunnels” your internet connection to locations around the world. TunnelBear can be used to protect your privacy, to bypass internet censorship made by some unscrupulous China hackers who now work with MTN in destabilizing our network. 

TunnelBear is a free app for iPhone/iPad  and Android mobile phone that gives you 500MB of free data each and every month.

How To Get TunnelBear
  1. Before you download, make sure you are running  iOS 5.0 and latter; Click here to download TunnelBear
  2. Run and install TunnelBear on your device
  3. Create your account here and sign in from your device
How To Set TunnelBear With BIS Plan
  1. Once you have successfully signed in from device,
  2. Go to Settings >> VPN >> Click On for VPN
  3. Make sure you Bis plan is actively connected
  4. Open your Safari Browser or any other browser and surf until you are tired.
That is it friends.
Note: You are only entitle to 500MB - 1.5GB per month free data as a free user, you can always upgrade for an unlimited account.

You Might Also Like: 
Feel free to Share/Like this post with your friends & many other useful tips are coming on your way, So, Subscribe Now, if you don't want to miss any of my future posts.

Friday, July 26, 2013

How To Solve Problem Of Internet Not Working On Android (Turn On Data)

Is your internet not working on your Android phone? Or your money is deducted when browsing while you still have an active data plan ? If so, there is a good chance that your phone is not connected to the data network. Just follow the below procedure to get it done.

From The Settings Menu:
  1. From the home screen, press the Menu key and then go to Settings.
  2. From the Settings menu, scroll and find “Wireless & Networks” or something similar (same place where you turn on bluetooth and wifi).
  3. From the “Wireless & Networks” menu, look for “Mobile Networks” or something similar.
  4.  From there, look for an option that says “Packet Data” or something similar and check the box if it is unchecked.
If the method above did not work, or was not available, try the below:

From The Power Menu:
  1. From the Home Screen, press and hold the power button.
  2. A pop up box should come up with a few options.
  3. Look for “Data Network Mode” or something along those lines.
  4. Click the “Data Network Mode” option, which will either toggle on or off the data network (depending on where it was).
This happens to most people by accident for one reason or another (they tend to claim the phone did it by itself). But there is a hidden benefit to doing this on PURPOSE. For example, say somebody needs to borrow your phone but you are worried that they will go on your Facebook and post something stupid. No problem! Just turn the data network off and they won’t even be able to connect but they will still be able to make the phone call and text people.

Don’t forget to always use the comment box to ask your questions and you will receive answers immediately. Also Feel free to Share/Like this post with your friend & family.
If you enjoyed this post and wish to be informed whenever a new post is published, then make sure you Subscribe to our regular Email Updates!

How To Browse Unlimitedly With Mtn Bis On Rooted And Unrooted Android Phone With DroidVPN

Most of us have already familiar with DroidVpn, as it is what we are using to surf the net with Mtn Bis now on the Android Mobile Phones. And almost every Android users are now enjoying it. I lately discovered that you don’t even need to root your Android device for those running Android 4.0 and above before you can use the DroidVpn. It works even without the tun.koinstaller.  It’s even faster on Un-rooted than the Rooted Android Devices, without any internet potholes.

How To Use DroidVPN On Unrooted Android Device
  1. Just visit Google play store and download DroidVPN if you haven’t done that yet
  2. Register an account at http://droidvpn.com/signup.php,  you will use the account you registered to sign into your DroidVPN app.
  3. Now open the DroidVPN and go to  Settings,  click on Connection Protocol and select UDP
  4. Use Port 500
  5. Make sure your Mtn Blackberry Plan is active with blackberry.net as your APN
  6. Connect and surf with the fastest speed ever!
Their is something special about this DroidVPN, it makes you browse unlimited. I experimented it with BISday Plan and I bet, I have already downloaded more than 8GB. The job of this VPN is to make your internet surfing unlimited if you are a premium user ooo. But it places  100MB embargo on free users.

You Might Also Like:

Feel free to Share/Like this post with your friends & You can also use this DroidVPN to give your PC and other device internet access from your Phone via "USB Tether", Bluetooth Tethering and Wifi hotspot. Which I have explained in one of my previous posts, So, Subscribe Now, if you don't want to miss any of my future posts.